Choosing a Towel Rail for Central Heating Systems
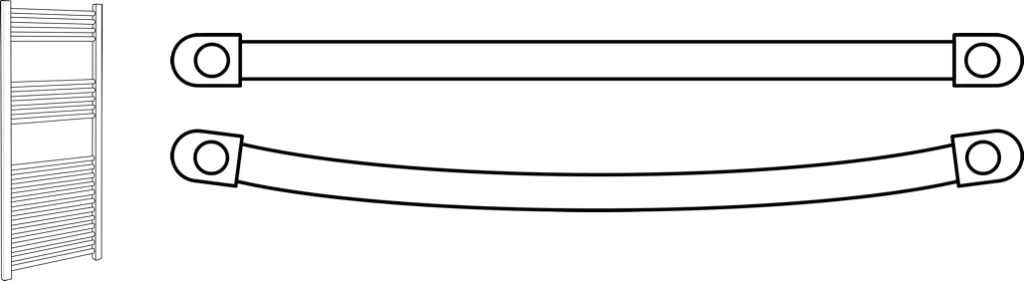
Select the shape - Straight or Curved
Straight Towel Rails protrude less into your bathroom whilst Curved versions allow some extra room for the towels.
The difference in output between both versions is unnoticeable.
Select a finish - Chrome or White
Chrome Towel Rails will most likely match better the finish of the brassware of your bathroom; however White coated versions have higher outputs, usually about a 30% higher. This is because powder coating transmits heat better than chrome plating.
Select a size
Depending on whether you are replacing an old towel rail or doing a new installation you be restricted by the width of existing pipework.
The most common widths for towel rails are 400, 500 & 600mm and the most common heights are 700, 800, 1200, 1500 & 1800mm.
If there are no size restrictions you may use our Heat Output Calculator to find out which size can be closer to what you require. Keep in mind that towel warmers are not meant to be the primary heat source for bathrooms which require a vast amount of heating (ie. external walls, poor insulation, etc.)
What else do I need?
A set of TRV and lockshield valves. Angled or Straight, depending on the pipework


Where to buy Kudox Towel Rails
![]()
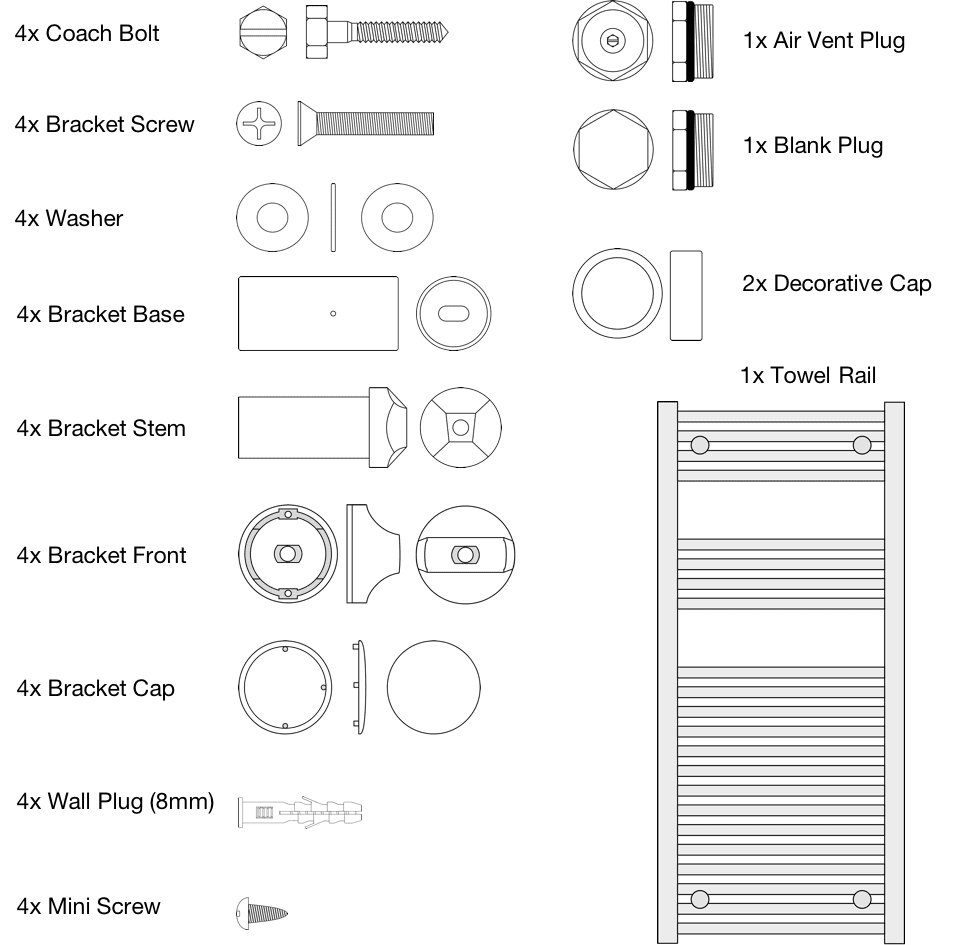
What's inside the box?
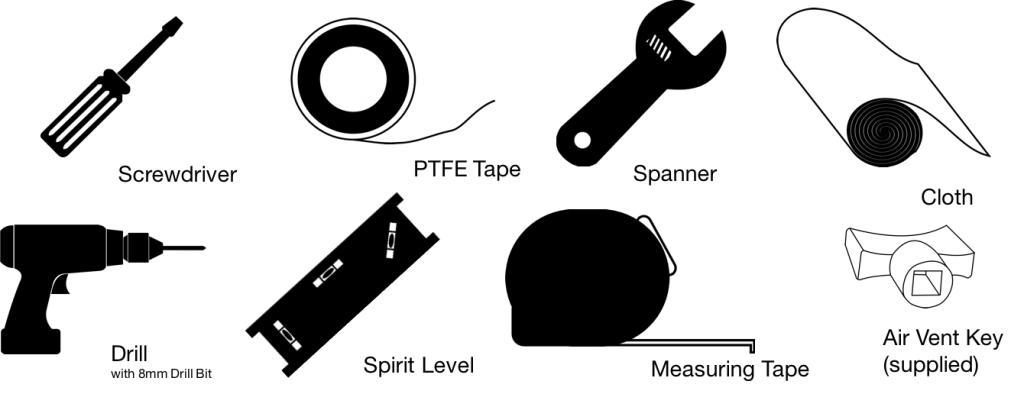
Installation Tools Required
Installation Guide - Kudox Central Heating Towel Rails
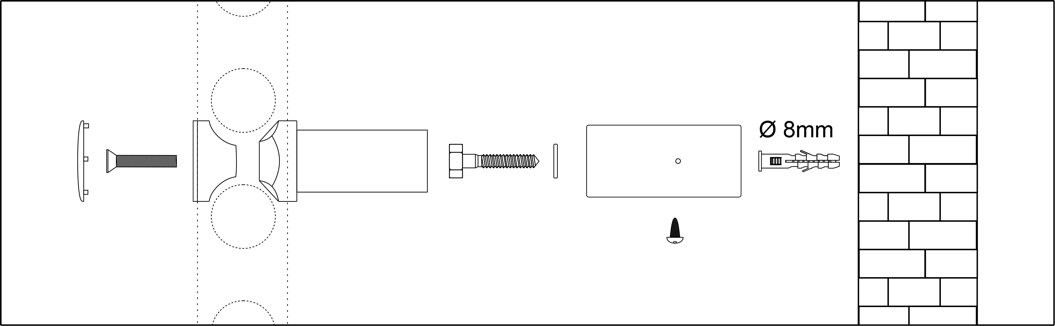
Step 1
Check that the wall is strong enough to hold the weight of the towel rail. Mark your preferred bracket positions on the wall and drill holes for the fixings you intend to use. The diameter of the Wall Plugs supplied is 8mm and they are only suitable for solid walls. You will need alternative fixings for other wall types.
Step 2
Screw the Bracket Bases to the wall using the Washers & Wall Screws provided or alternative fixings.
Step 3
Loosely fit the Bracket Stems to the towel rail with the Bracket Fronts & Bracket Screws. Rotate the Bracket Stems as shown in the diagram below.

Step 4
Align the Bracket Stems with the Bracket Bases and push the towel rail back into position.
Step 5
Tighten the central Bracket Screws with a screwdriver.
Step 6
Insert the Mini Screws into the holes in the underside of Bracket Bases and tighten with a screwdriver to fix the Bracket Stem into the Bracket Base
Step 7
Push the Cover Caps into position on the Bracket Fronts.
How to assemble the brackets for a standard towel rail
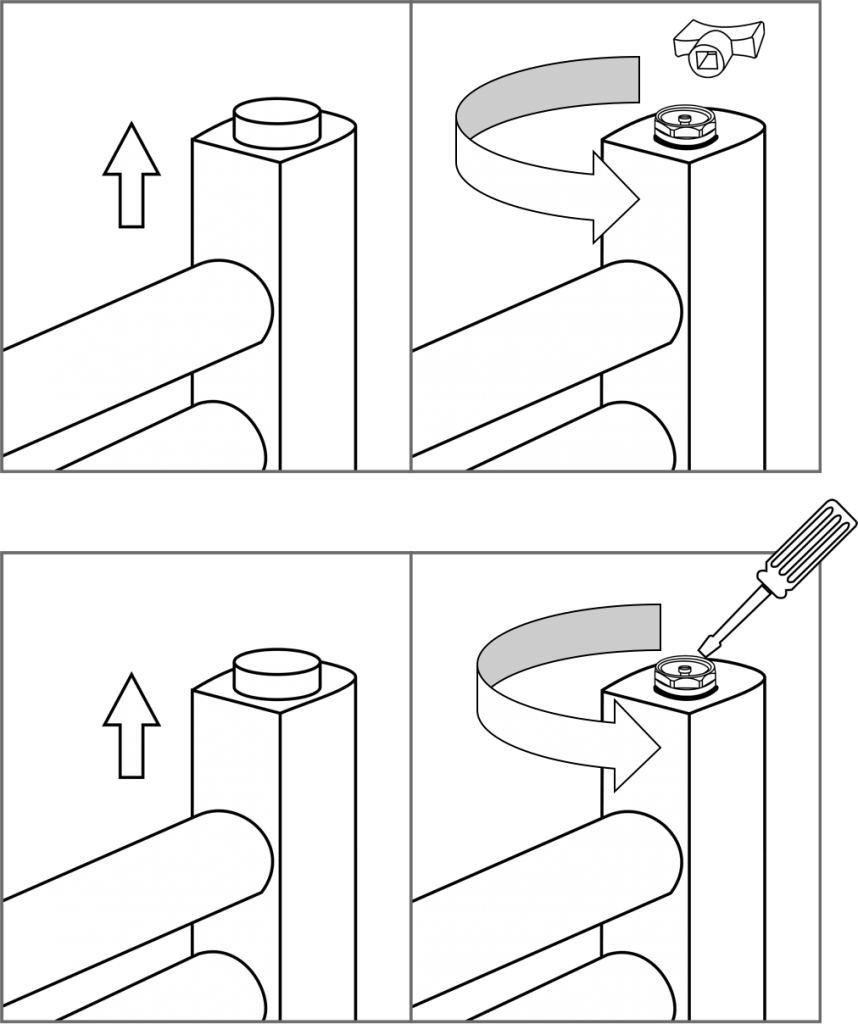
How to bleed a towel rail
The easiest is to use an Air Vent Key. Just switch off the heating, insert the key into the groove of the air vent plug and turn it anti-clockwise until you hear a hissing sound.
You will hear the hissing sound before it starts to dribble. Once water starts coming out, tighten the screw turning it clockwise to prevent any leaks. It is useful to have a cloth around as some liquid will come out of the towel rail.
If you do not have an Air Vent Key, you could also use a small flat head screwdriver.
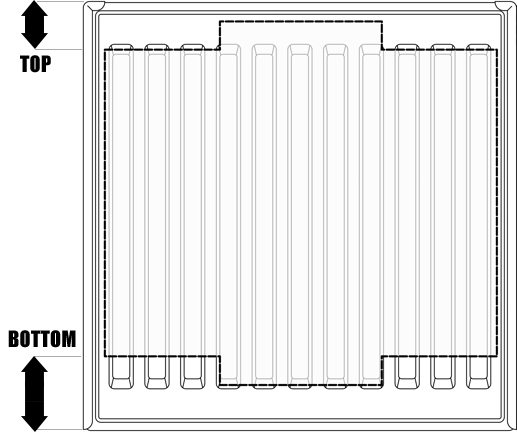
How to know what is the upright position of a radiator
The distance from the top of the convector fin to the top seam of the radiator is smaller than from the bottom of the convector fin to the bottom edge of the radiator.
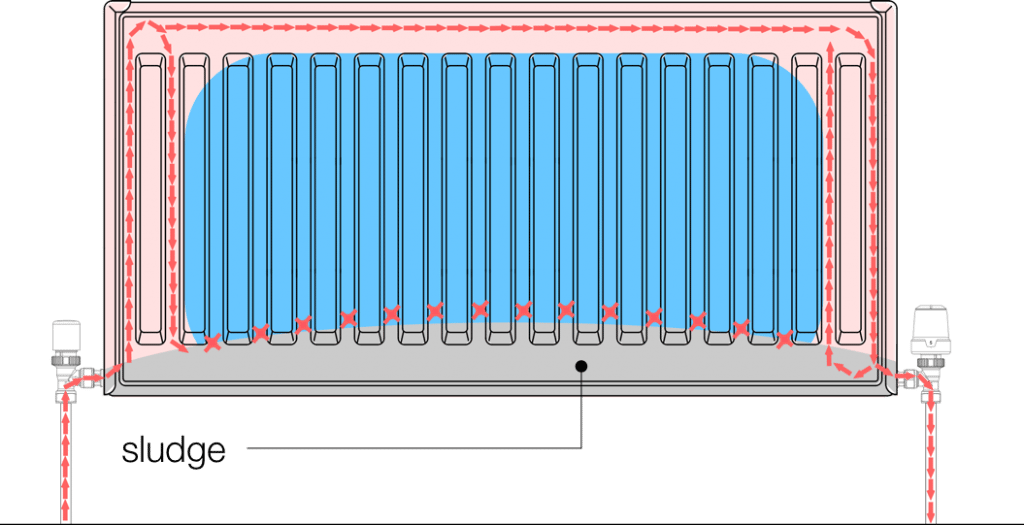
How to remove sludge from a radiator
When a radiator is cold at the bottom, it is most likely that there is sludge in the system that settles and does not allow the water flow as it should.
Manual Flush
The radiator would need to be disconnected from the system and flushed using a hose until the water comes clean out of the radiator.
Powerflush
Powerflushing units are the most effective way to remove sludge from the entire system. They pump fresh water through the system at high flow rates to remove any residues that decrease the efficiency of the system and can lead to premature failures of any component.
How to balance a Central Heating System
Step 1
Turn off the heating and open the valves

Step 2
Allow all radiators to cool down
Step 3
Turn on the heating and work out what order they heat up. You will need to sort them from quicker to slower

Step 4
Turn off the heating again and wait until the system cools down

Step 5
Turn on the heating again and then go to the first radiator in your list and close the lockshield fully.

Step 6
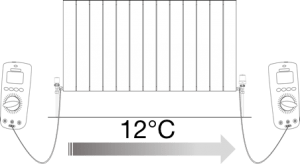
Open the lockshield by a quarter of a turn and take a temperature reading.

Step 7
Go to the opposite valve and take a temperature reading. Start opening gradually the lockshield until the difference in temperature is 12°C
Step 8
Keep doing the same will all radiators in the order of the list. You will find that the further that the radiator is from the boiler the more you will need to open the lockshield.
Troubleshooting Guide - Panel Radiators
| Problem | Possible Cause | Solution |
| The radiator does not get hot on the top | There is air trapped in the system | Refer to How to…Bleed a radiator |
| The radiator has been installed upside down | Refer to How to…Know what is the upright position |
|
| The radiator does not get hot at the bottom | There is sludge in the system | The system needs to be flushed – Refer to How to…Remove sludge |
| The radiator gets warm only in one side | TBSE Connection | Whilst Top – Bottom of the Same End Connections might work in short radiators, we do not recommend it as this will significantly reduce the output of the radiator |
| The radiator does not get as warm as expected | The system is not balanced | Refer to How to… Balance the system |
| The system cannot feed the radiator adequately | Large radiators that are retrofitted in existing installations might require upgrading other components of the installation as the boiler or the pump to be able to feed the new radiator as it needs | |
| The radiator is noisy | Radiators do not have any moving parts so should be virtually silent. | |
| The system is not balanced | Balance the System. Excessive water flow can cause noise. | |
| There is metal to metal contact | Check that the bracket buffers are in good condition and fitted as explained in the instructions manual | |
| The expansion of the pipework can cause noise around the radiator, the installation would need to be checked | ||